


Top Sewing Room Organization Ideas to Maximize Space
Welcome to the ultimate guide for transforming your sewing space from a tangled web of threads and fabric scraps into a streamlined sanctuary of creativity. A well-organized sewing room isn't just about aesthetics; it's about efficiency, inspiration, and protecting your valuable tools and materials. When you can find what you need precisely when you need it, your creative flow remains uninterrupted, allowing you to focus on bringing your designs to life.
An organized space is the foundation of every successful project. The right setup can turn a frustrating search for a specific bobbin into a seamless transition from one task to the next. The difference between a chaotic workspace and a functional studio often comes down to a few key sewing room organization ideas that maximize your footprint and create logical homes for every tool and supply. This requires a bit of strategic thinking. To delve deeper into the fundamental principles behind creating a highly functional and organized room, understand what space planning entails and how to apply those concepts to your unique area.
In this comprehensive guide, we'll explore nine transformative systems that go beyond basic tidying. We'll delve into specific, actionable solutions like pegboard walls for vertical tool storage, rolling carts for mobile project stations, and dedicated filing systems for your precious patterns. We will cover a range of options, from a Pegboard Wall System to a Cutting Table with Built-in Storage, ensuring you find the perfect solution whether you have a dedicated studio or a cozy corner. Get ready to conquer the clutter and build the functional, inspiring sewing room you've always dreamed of.
1. Pegboard Wall System: The Ultimate Vertical Command Center
A pegboard wall system transforms unused vertical space into a highly efficient and customizable "command center" for your sewing supplies. This method uses a perforated hardboard panel mounted on the wall, allowing you to insert a variety of hooks, shelves, bins, and holders. It is one of the most versatile sewing room organization ideas because it keeps your most frequently used tools visible, organized, and within arm's reach, eliminating the need to rummage through drawers.
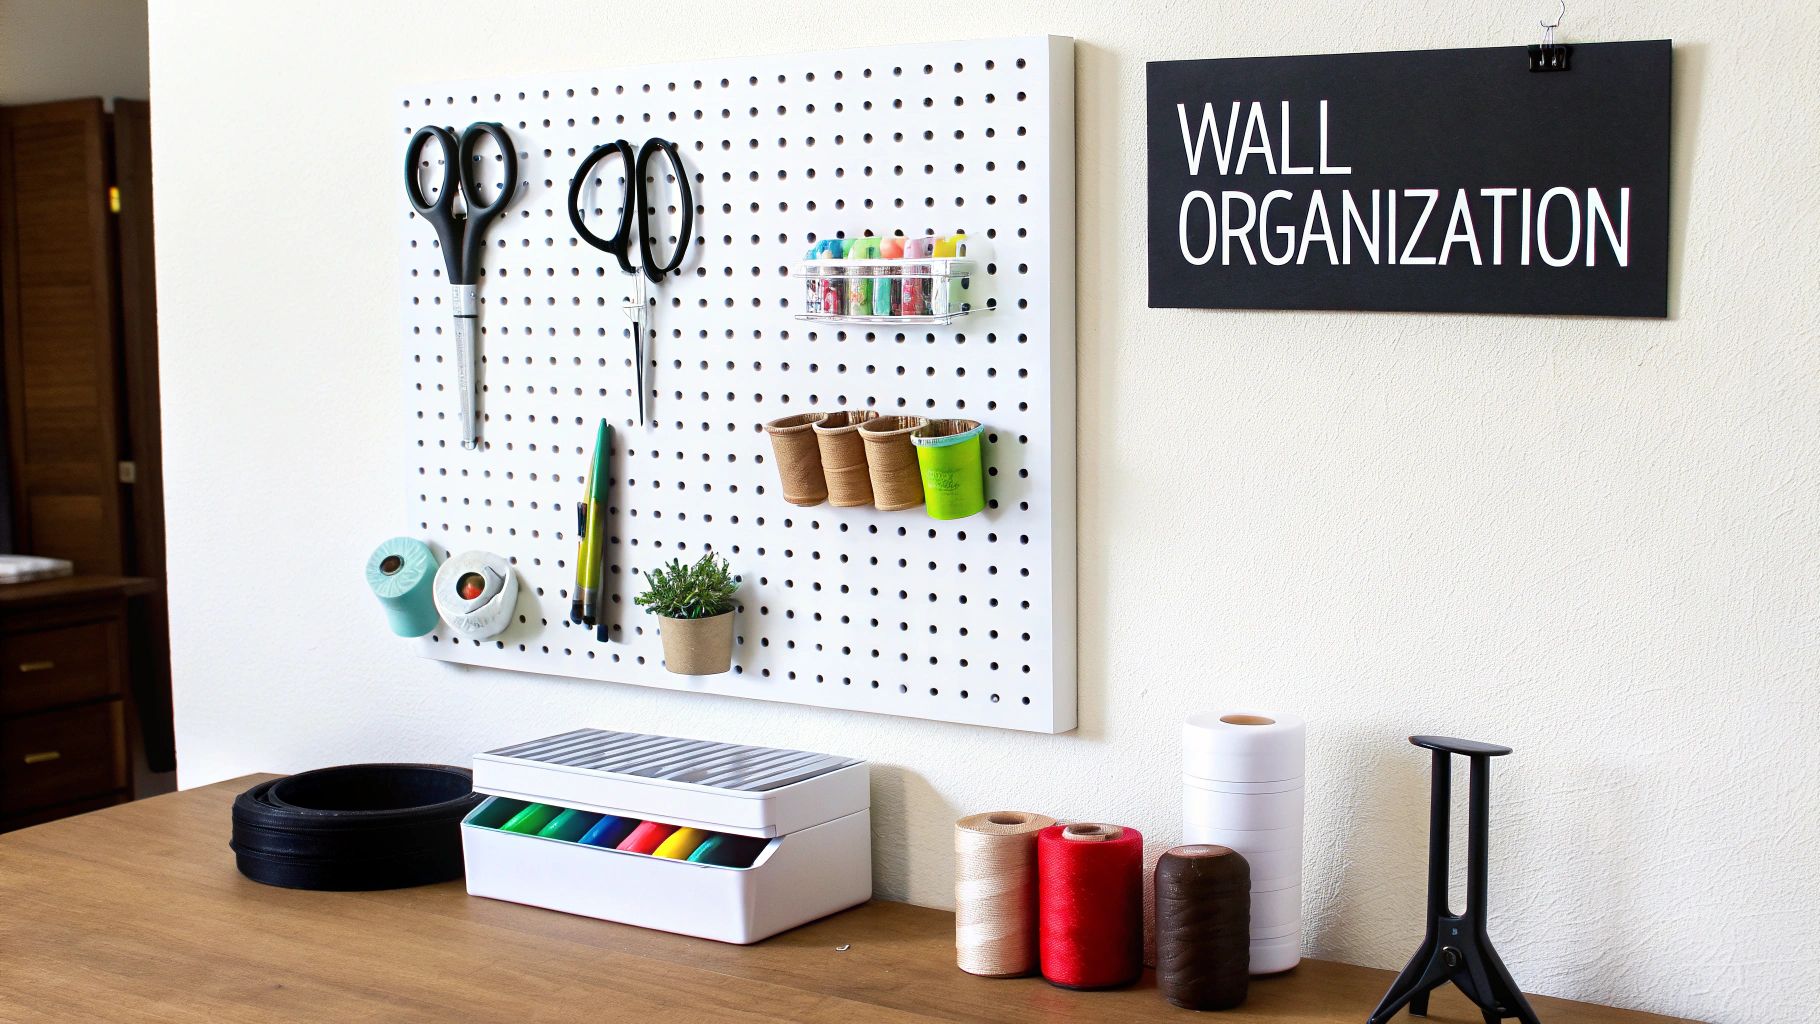
This system is ideal for sewists who feel overwhelmed by cluttered work surfaces and want to maximize a small space. By moving items like scissors, rulers, thread spools, and rotary cutters onto the wall, you free up valuable desk and counter space for cutting fabric and operating your sewing machine. Popular, ready-to-install systems like the IKEA SKÅDIS series or Elfa from The Container Store make implementation straightforward, even for those new to DIY projects.
How to Implement a Pegboard System
Getting started with a pegboard is simple. First, determine the best wall space, ideally near your primary work area. Measure the area to decide on the size of the board you'll need.
- Plan Your Layout: Before drilling any holes, lay the pegboard on the floor and arrange your tools on it. This helps you visualize the most efficient layout and ensure everything fits perfectly. Group similar items together, like cutting tools in one section and marking tools in another.
- Secure Installation: To support the weight of your tools, the pegboard must be mounted on a frame or with spacers that create a small gap between it and the wall. This gap is crucial for allowing the hooks to be inserted properly.
- Customize with Accessories: The real power of a pegboard lies in its accessories. Use long hooks for rulers and rotary cutters, small bins for bobbins and buttons, and specialized holders for spools of thread.
For a cohesive look, you can even paint the pegboard to match your room's decor, turning a functional storage solution into a personalized design feature.
2. Clear Storage Containers with Labels: A See-Through System
Clear storage containers with a consistent labeling system bring order and clarity to the chaos of fabric scraps, notions, patterns, and miscellaneous supplies. This method relies on transparent boxes, bins, and drawers to make contents instantly identifiable, saving you precious time you would otherwise spend searching. As one of the most foundational sewing room organization ideas, it protects your valuable materials from dust, moisture, and pests while maintaining a tidy, streamlined aesthetic.
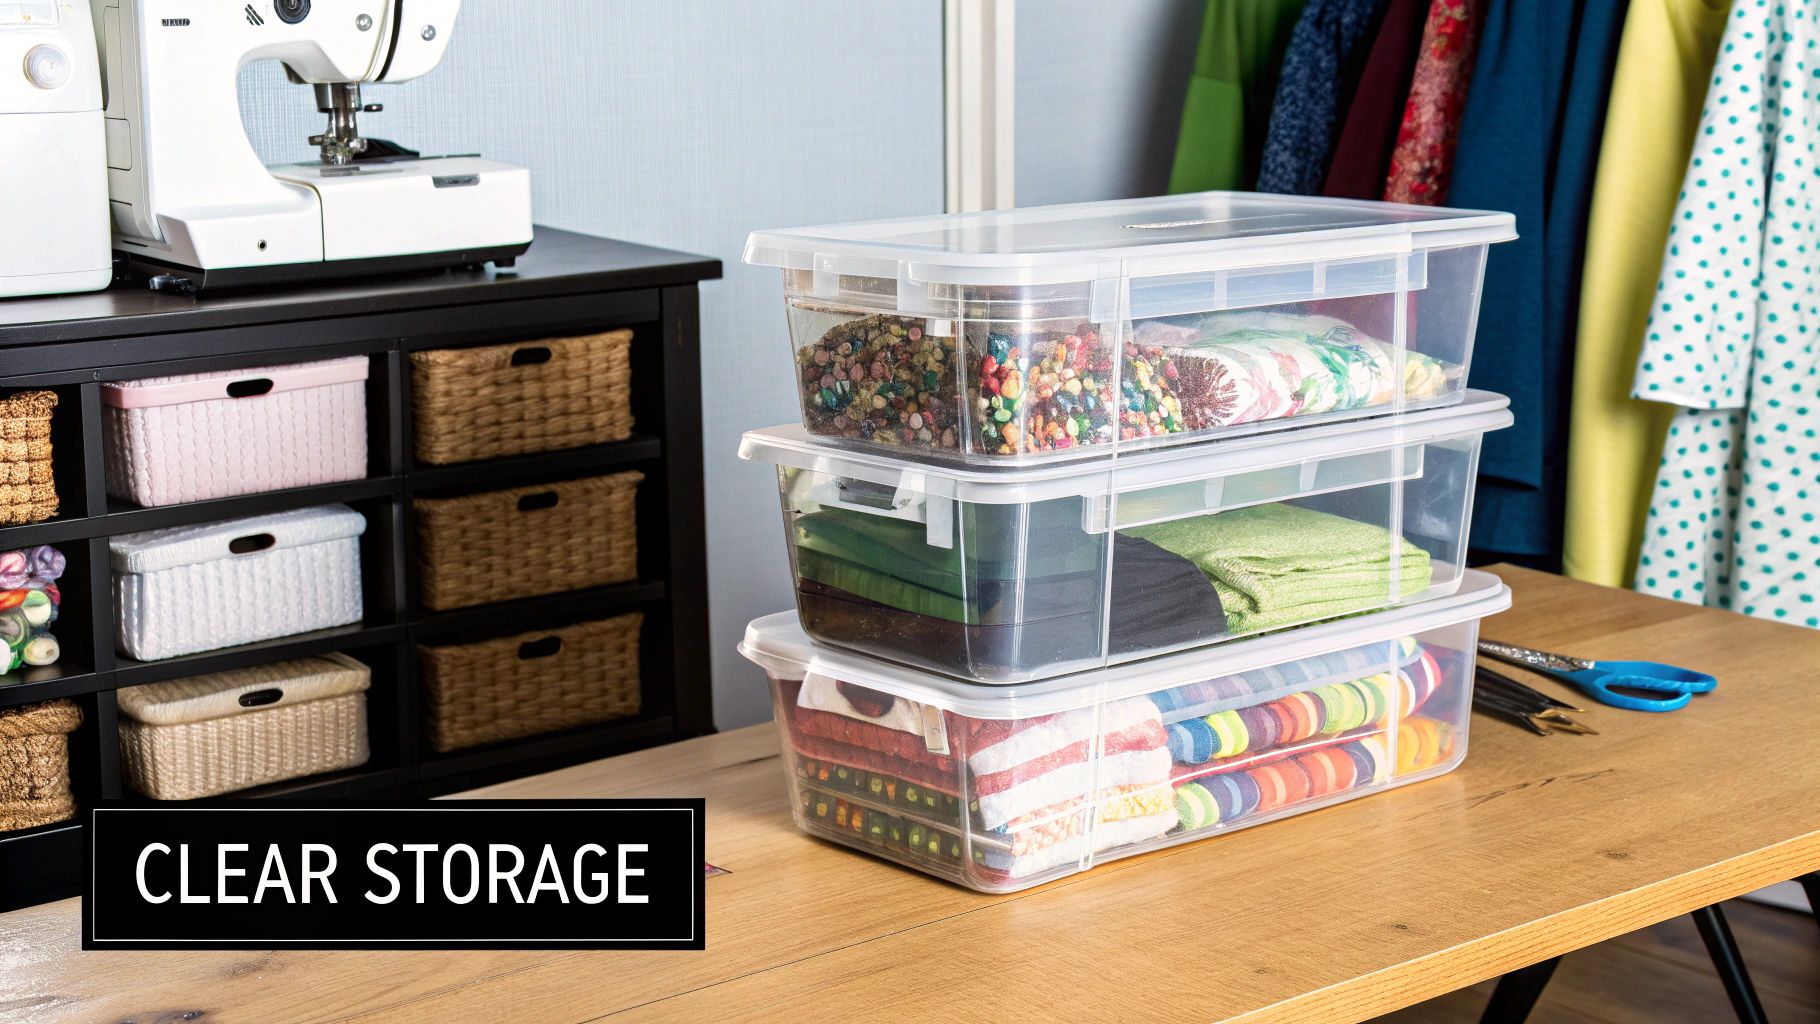
This approach is perfect for sewists who have a large and varied collection of supplies that need to be categorized and contained. Instead of guessing what’s inside an opaque box, you can see at a glance if it holds zippers, elastic, or interfacing. Systems like Sterilite drawer towers are popular for home setups, while the stackable design of Really Useful Boxes is a favorite in quilting studios for managing fabric collections. The key benefit is creating a "visual inventory" that simplifies finding what you need and knowing when to restock.
How to Implement a Clear Container System
Getting started with clear containers is a satisfying project that yields immediate results. Begin by sorting your supplies into logical categories like "mending supplies," "cutting tools," or "interfacing types."
- Choose the Right Containers: Select containers that fit your space and your items. Use small, sectioned containers for buttons and bobbins, flat project boxes for patterns and works-in-progress, and larger bins for fabric yardage. Invest in durable, crack-resistant plastic for longevity.
- Create a Labeling System: Consistency is crucial. Use a label maker for a clean, uniform look. Your labels should be specific but concise, for example, "1/4" Black Elastic" instead of just "Elastic." For bins with many small, varied items, consider taping a photo of the contents to the outside for even faster recognition.
- Stack and Store Strategically: Arrange your containers logically. Place frequently used items in easily accessible locations, like on open shelves or in drawer units near your work area. Less-used supplies can be stored on higher shelves or in closets. Regularly review and update labels as your collection evolves.
3. Rolling Cart Storage System: Your Mobile Project Station
A rolling cart storage system introduces unparalleled flexibility into your sewing room, acting as a mobile project station that can be moved wherever you need it. This method uses a multi-tiered cart, often with bins or shelves, to consolidate all the tools and materials for a specific project in one place. It is one of the most dynamic sewing room organization ideas, as it allows you to bring your supplies to your cutting table, sewing machine, or ironing board, streamlining your workflow and minimizing time spent searching for items.
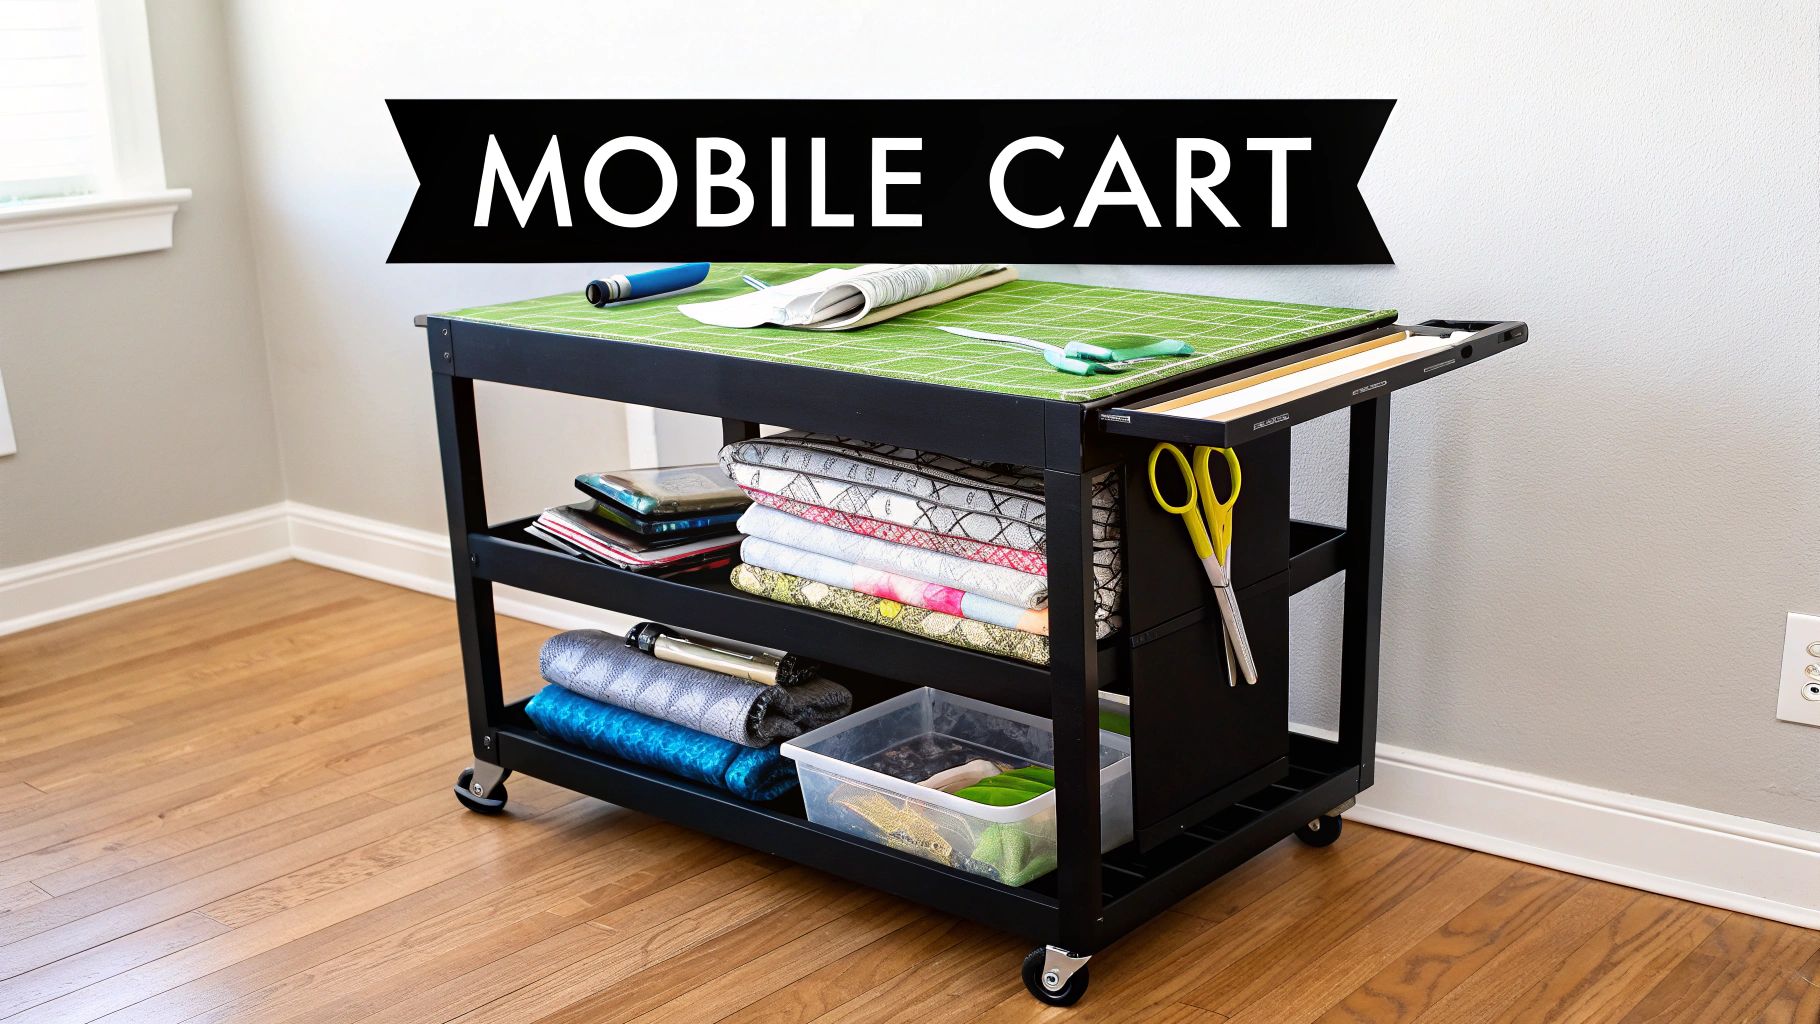
This system is perfect for sewists who work on multiple projects simultaneously or have a multi-purpose creative space. By dedicating a cart to each ongoing project, you can easily switch between them without having to clear and reset your entire work surface. Popular options like the IKEA RÅSKOG cart or Honey-Can-Do rolling carts are celebrated for their compact footprint and versatility. To enhance the mobility and flexibility of your sewing projects, a rolling cart system is invaluable. Explore more about how these mobile shelving solutions can transform your creative process by keeping everything you need on the move.
How to Implement a Rolling Cart System
Setting up a rolling cart is an intuitive way to boost your sewing room's efficiency. The key is to organize it logically for the task at hand.
- Assign a Purpose: Designate each cart for a specific function. One could be a "cutting station" with rotary cutters, rulers, and mats, while another could be a "WIP (Work-in-Progress)" cart holding the fabric, thread, and notions for your current project.
- Organize with Dividers: Use small bins, jars, or drawer dividers within the cart's tiers to compartmentalize small items like pins, bobbins, and buttons. This prevents them from getting lost at the bottom of a shelf.
- Prioritize Stability and Accessibility: Place heavier items, such as fabric bolts or large rulers, on the bottom shelf for stability. Keep your most frequently used tools on the top tier for quick access. Look for carts with locking wheels to ensure they stay put while you work.
For an extra layer of organization, you can add magnetic strips to the sides of a metal cart to hold scissors and seam rippers, or use S-hooks to hang tools with loops. This turns a simple cart into a fully customized and portable sewing assistant.
4. Thread Organization Towers: A Rainbow of Efficiency
A thread organization tower or rack is a specialized storage solution designed to conquer the chaos of unruly spools. These systems, which come in wall-mounted, freestanding, or rotating tower formats, use pegs or spindles to hold each spool individually. This method is one of the most effective sewing room organization ideas for managing thread because it prevents tangling, protects thread from dust and sunlight, and displays your entire color palette for quick and easy selection.
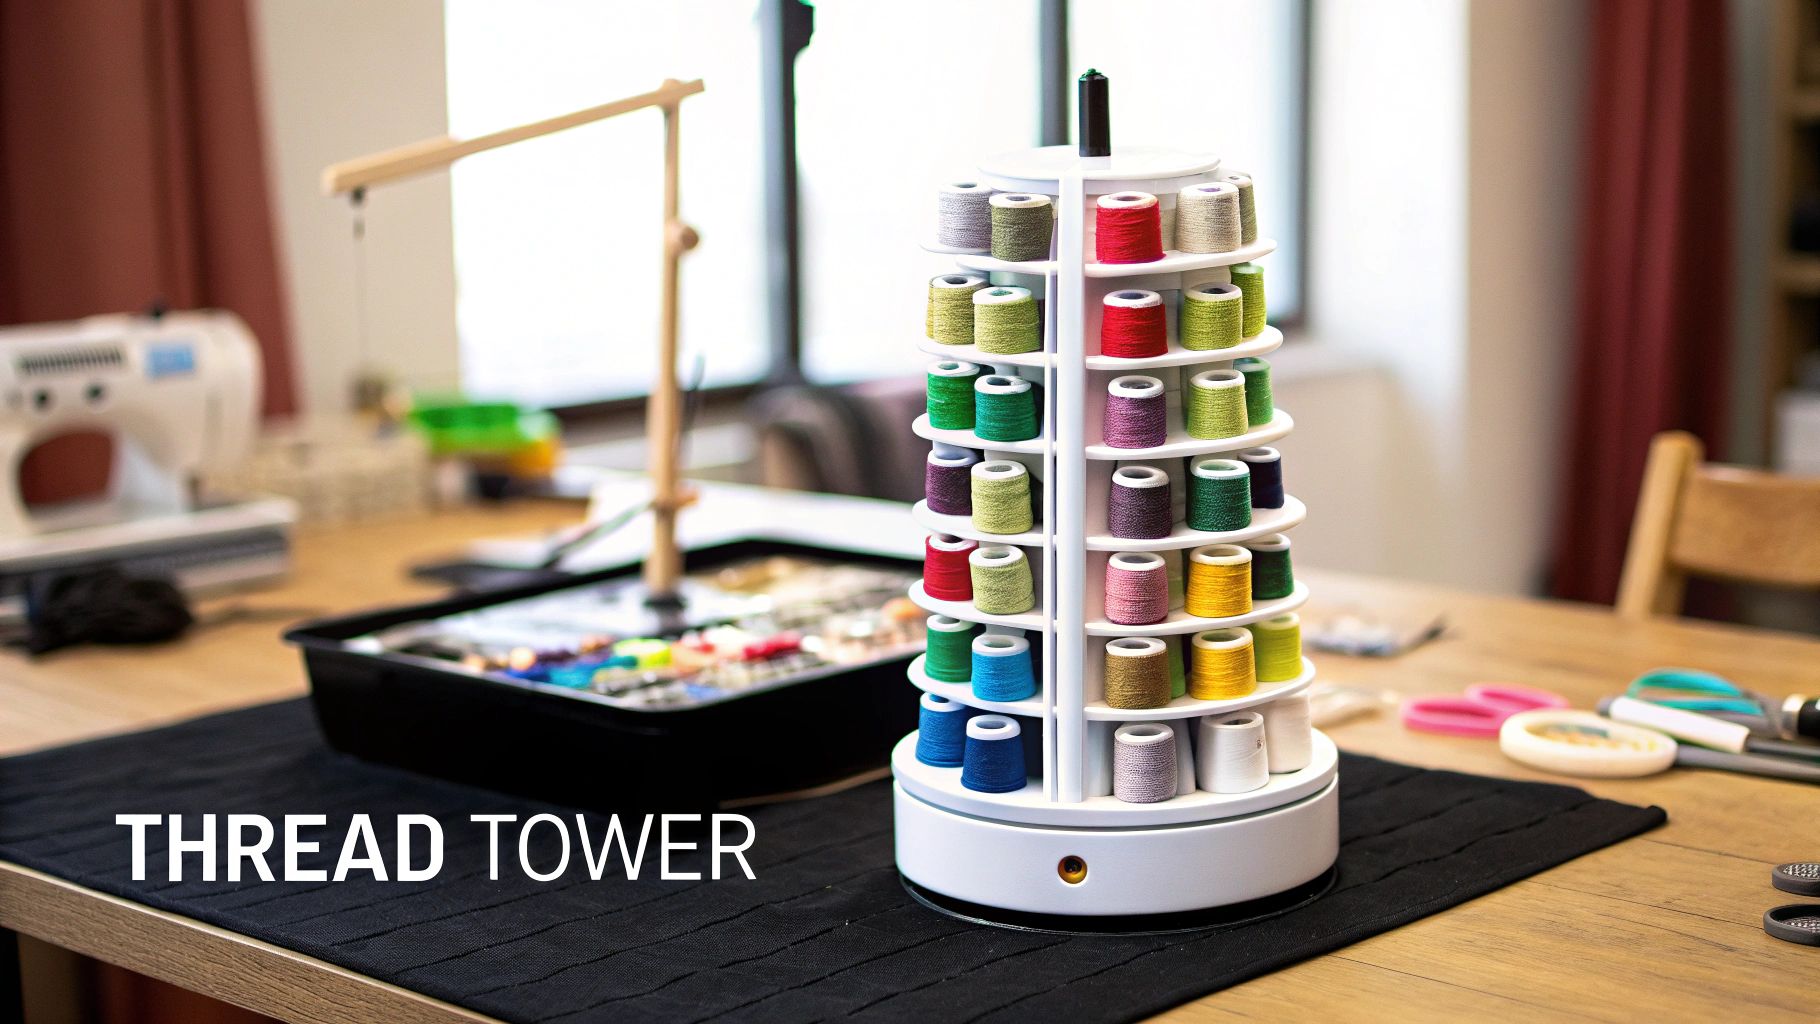
This solution is perfect for quilters, embroiderers, and any sewist with an extensive thread collection. By organizing spools visibly, you can instantly find the perfect shade without digging through a tangled mess in a box or drawer, saving valuable time and reducing frustration. Popular options range from large, professional-grade Madeira towers seen in embroidery shops to compact, wooden racks ideal for home studios, making it a scalable system for any collection size.
How to Implement a Thread Organization System
Choosing and setting up a thread rack is straightforward. First, assess your thread collection and available space. A wall-mounted rack saves surface area, while a rotating tower provides high-capacity storage in a small footprint.
- Organize by Color: The most intuitive method is to arrange your spools in rainbow order or by color families (e.g., all blues together, from light to dark). This creates a visually pleasing display and makes matching thread to fabric a breeze.
- Consider Thread Type: If you use various thread types, such as cotton, polyester, and embroidery thread, group them separately. This helps you grab the correct type for your specific project without confusion. For example, dedicate one rack to quilting cottons and another to specialty metallic or silk threads.
- Prevent Unraveling: For spools that tend to unwind, use small "thread nets" or "spool huggers." These inexpensive accessories slip over the spool to keep the thread tail neatly in place, maintaining a tidy and functional display.
By dedicating a specific home for your thread, you not only protect your investment but also turn your colorful collection into an inspiring and functional piece of your sewing room decor.
5. Fabric Bolt Storage and Shelving: Create Your Own Fabric Store
Transform your fabric stash from a jumbled pile into an inspiring, browse-able collection with a fabric bolt storage and shelving system. This method mimics the organized displays found in fabric stores, using dedicated shelving to store fabric neatly wrapped around bolts or boards. It is one of the most effective sewing room organization ideas for managing large collections, as it prevents deep-set wrinkles, protects your investment, and allows you to see your entire inventory at a glance.
This system is ideal for quilters and garment sewists with substantial yardage, helping to stop fabric from getting lost or damaged in bins. By organizing your materials by color, type, or project, you can quickly "shop your stash," sparking creativity and saving time. Whether you use industrial shelving units like KALLAX from IKEA, custom-built cubbies, or even closet rods to hang mini-bolts, this approach brings professional-level organization into your home sewing space.
How to Implement Fabric Shelving
Setting up an efficient fabric storage system begins with assessing your collection and space. Measure your available area, whether it's a full wall or a closet, to determine the best shelving solution.
- Choose Your "Bolt" Method: You don't need professional bolts. For larger cuts of fabric, wrap them around sturdy cardboard or foam core boards. For smaller pieces like fat quarters, use comic book backing boards; they are acid-free and perfectly sized.
- Select Appropriate Shelving: Open shelving units with deep cubbies work best for standing bolts upright. Alternatively, you can install dowel rods or tension rods in a closet or bookcase to hang smaller, rolled bolts of fabric like you’d see in a retail shop.
- Organize for Inspiration: Arrange your fabric bolts in a way that makes sense for your workflow. A rainbow color gradient is visually stunning and practical. You could also group fabrics by type (cotton, knit, silk) or by project, making it easy to pull everything you need for your next creation.
To take your organization a step further, create a simple inventory spreadsheet or use a digital app to track your collection, noting yardage and where each fabric is stored.
6. Magnetic Tool Organization: Instant-Access Metal Tool Storage
Magnetic tool organization is a brilliant hack borrowed from professional kitchens and workshops that keeps your essential metal tools secure, visible, and instantly accessible. This method uses magnetic strips, boards, and bowls to hold items like scissors, seam rippers, pins, and bobbins, preventing them from getting lost in drawers or cluttering your workspace. It's a highly effective sewing room organization idea for anyone who constantly reaches for the same few metal implements.
This system is perfect for sewists who want to streamline their workflow and maintain a clean, safe cutting and sewing area. By mounting a magnetic knife strip on the wall above your cutting mat, your rotary cutters and fabric shears are always within reach but safely out of the way. Small magnetic bowls placed near your sewing machine can corral pins and clips, putting an end to accidental spills and lost notions.
How to Implement Magnetic Organization
Integrating magnetic storage is straightforward and can be customized to fit any space. Start by identifying the tools you use most frequently and the most logical places to keep them.
- Choose Your Magnetic Holders: Simple magnetic knife bars from kitchen supply stores are perfect for holding heavier items like scissors and rotary cutters. For smaller items like pins, needles, and bobbins, consider magnetic pin bowls or DIY magnetic boards made by framing a piece of sheet metal.
- Strategic Placement: Mount magnetic strips on the wall beside your sewing machine, on the side of a rolling cart, or inside a cabinet door. Be mindful to keep strong magnets away from the computerized components of your sewing machine to avoid any potential interference.
- Test Tool Compatibility: Before permanently mounting anything, test that your tools are magnetic and that the magnet is strong enough to hold them securely. Heavy fabric shears will require a much stronger magnet than a small seam ripper.
This simple, low-cost solution declutters surfaces and enhances safety by giving every sharp metal tool a designated home, making it one of the most practical sewing room organization ideas available.
7. Pattern Storage Filing System: Taming the Paper Chaos
A dedicated pattern storage filing system is essential for taming the paper chaos that can quickly overwhelm a sewing space. This method treats your sewing patterns like important documents, organizing them in a way that prevents damage and makes finding the right design effortless. Whether you prefer commercial paper patterns, traced copies, or digital PDFs, a systematic approach protects your investment and streamlines your creative process, making it one of the most effective sewing room organization ideas for any sewist.
This system is perfect for sewists with a growing collection who are tired of crumpled envelopes and lost pattern pieces. By implementing a filing solution, such as a standard filing cabinet, magazine holders, or large flat drawers, you create a designated home for every pattern. This not only keeps your workspace tidy but also makes browsing your collection feel more like visiting a library than digging through a pile, inspiring you to start new projects.
How to Implement a Pattern Filing System
Creating an effective pattern filing system starts with choosing the right method for your specific pattern types and space. First, gather all your patterns and decide how you want to categorize them.
- Choose Your Method: For standard pattern envelopes, a filing cabinet with hanging folders is a classic choice. Label tabs by category (dresses, tops, pants) or by brand (McCall's, Butterick, Simplicity). For larger traced patterns, architect-style flat file drawers or large art portfolios are ideal for keeping them uncrumpled. Magazine file boxes are a great, budget-friendly option for smaller collections.
- Organize and Catalog: Once sorted, place your patterns into their designated folders or containers. For a more advanced system, create a digital catalog or a simple spreadsheet. List each pattern, its number, and a brief description. You can even add a photo of the envelope for a quick visual reference.
- Manage Digital Patterns: For PDF patterns, create a similar folder structure on your computer or cloud storage service. Name files consistently (e.g., "Brand_PatternName_SizeRange.pdf") and back them up regularly to avoid losing your digital library.
By establishing a clear system, you ensure every pattern, whether paper or digital, is protected, easy to find, and ready for your next creative endeavor.
8. Modular Drawer System: Customizable Compartmentalization
A modular drawer system offers a streamlined and enclosed solution for organizing countless sewing notions, tools, and small fabric cuts. This approach uses configurable drawer units, often with adjustable dividers and inserts, to create designated spots for everything from bobbins and buttons to specialized presser feet. It is one of the most effective sewing room organization ideas for protecting supplies from dust and light while keeping your workspace looking tidy and uncluttered.
This method is perfect for sewists who prefer a "less is more" aesthetic and want to hide visual clutter behind sleek drawer fronts. Unlike open shelving, drawers keep items contained and categorized out of sight. Popular solutions like the IKEA Alex drawer units are famous in the crafting community for their versatility, while Sterilite towers offer a more budget-friendly, portable option. This system allows your storage to adapt and grow alongside your collection of supplies.
How to Implement a Modular Drawer System
Setting up a drawer system is all about strategic compartmentalization. Start by taking inventory of your smaller sewing supplies to understand how many drawers and dividers you'll need.
- Categorize and Contain: Group similar items together before assigning them to a drawer. Use adjustable drawer dividers, small trays, or acrylic inserts to create specific compartments for each category. This prevents items from becoming a jumbled mess.
- Label Everything: Use a label maker or simple adhesive tags to clearly mark the front of each drawer or the internal dividers. This saves you from having to open multiple drawers to find what you need.
- Prioritize Accessibility: Place your most frequently used items, like common thread colors, seam rippers, and marking pens, in the top drawers for easy access. Reserve the lower drawers for less-used or bulkier supplies.
- Prevent Sliding: Line drawers with non-slip matting to keep tools and organizers from shifting around when you open and close them. This is especially helpful for protecting delicate or sharp tools.
By regularly purging items you no longer use, you can maintain an efficient and highly organized system that supports a calm and productive creative environment.
9. Cutting Table with Built-in Storage
A cutting table with built-in storage is a game-changing piece of furniture that combines a large, dedicated work surface with integrated organization. These tables are designed at an optimal height for standing and cutting fabric, which helps reduce back strain while providing ample space for large projects like quilts or garment patterns. This dual-purpose design is one of the most functional sewing room organization ideas, as it keeps your cutting tools and project materials neatly stored right where you need them.
This solution is perfect for quilters and garment sewists who frequently work with large cuts of fabric and need a clutter-free surface. Instead of monopolizing a dining room table or working on the floor, a dedicated cutting table centralizes the entire preparation phase of a project. Popular options range from specialized Sew Ready cutting tables with foldable leaves and wire baskets to custom-built solutions and creative kitchen island conversions, all of which keep supplies like rotary cutters, rulers, and fabric organized and accessible.
How to Implement a Cutting Table with Storage
Integrating an effective cutting table into your space focuses on ergonomics and efficiency. First, assess your available floor space and the typical size of your projects to determine the ideal table dimensions.
- Choose the Right Height: The table surface should be at about your elbow height when you are standing. This ergonomic position minimizes hunching and makes long cutting sessions more comfortable.
- Protect the Surface: Always use a large, self-healing cutting mat that covers most of the tabletop. This protects the table from blade marks and provides a safe, non-slip surface for cutting.
- Organize the Storage: Use the built-in shelves, drawers, or cubbies strategically. Dedicate specific compartments for rotary cutters, various rulers, marking tools, and works-in-progress. This ensures your tools are always within arm's reach but off the main work surface.
- Consider Mobility: If your sewing room serves multiple purposes, choose a table with lockable caster wheels. This allows you to easily move the table out of the way when it's not in use, offering valuable flexibility in a smaller space.
To further enhance its functionality, install bright, focused task lighting directly above the cutting table to improve accuracy and reduce eye strain.
9-Option Sewing Room Storage Comparison
| Storage System | Implementation Complexity 🔄 | Resource Requirements ⚡ | Expected Outcomes 📊 | Ideal Use Cases 💡 | Key Advantages ⭐ |
|---|---|---|---|---|---|
| Pegboard Wall System | Medium - requires wall mounting and planning | Low - basic hardware and pegboard | Organized, visible tools; flexible layout | Compact spaces needing vertical tool organization | Highly customizable; easy to reconfigure; cost-effective |
| Clear Storage Containers | Low - simple stacking and labeling | Medium - investment in quality containers | Protected, visible materials; dust and pest resistance | Storing fabric scraps, notions needing protection | Transparent for quick ID; stackable; professional look |
| Rolling Cart Storage System | Medium - select proper cart, arrange and organize | Medium - cost varies by model | Mobile, flexible storage for active projects | Users who move supplies around workspace frequently | Mobile and versatile; adds work surface; easy cleaning |
| Thread Organization Towers | Medium - select tower type and arrange thread | Low to Medium - depends on size | Neat, color-coded thread access; prevents tangling | Large thread collections requiring order and protection | Protects thread quality; efficient color selection |
| Fabric Bolt Storage & Shelving | High - requires dedicated space and shelving installation | Medium to High - shelving & storage costs | Wrinkle-free fabric storage; visible inventory | Large fabric collections needing layout and protection | Maintains fabric condition; maximizes storage density |
| Magnetic Tool Organization | Low - mount strips or holders | Low - magnetic accessories | Easy access to metal tools; saves search time | Small spaces with metal tools needing quick access | Saves space; tools visible and accessible; easy to install |
| Pattern Storage Filing System | Medium - requires filing units and categorization | Medium - filing drawers, folders | Protected patterns; easy retrieval | Organizing physical and digital pattern collections | Prevents damage; improves findability; scalable |
| Modular Drawer System | Medium - installation and customization | Medium to High - units and dividers | Dust-free, customizable organization | Storing varied small notions and tools efficiently | Flexible configurations; professional appearance; dust protection |
| Cutting Table with Built-in Storage | High - large furniture purchase and setup | High - significant investment | Ergonomic cutting surface plus organized tools | Users needing dedicated cutting workspace | Reduces strain; combines work surface and storage; professional results |
Stitching It All Together: Your Path to a Perfect Sewing Space
Embarking on the journey to a more organized sewing room is a powerful act of self-care for your creative soul. It’s about more than just finding a place for everything; it’s about designing a workflow that eliminates friction and allows your ideas to flow freely from imagination to finished project. Throughout this guide, we've explored a variety of practical and innovative sewing room organization ideas, each designed to tackle a specific challenge within your creative sanctuary.
From the vertical efficiency of a pegboard wall system to the mobile convenience of a rolling cart, the solutions we've covered are building blocks for a personalized system. You’ve seen how clear, labeled containers can demystify your stash, how a dedicated pattern filing system can save precious time, and how magnetic tool strips can keep your most-used implements within immediate reach. These aren't just abstract concepts; they are tangible strategies to reclaim your space and your focus.
Your Action Plan for a Transformed Creative Space
The key to lasting success is not to implement every single idea at once, but to choose the ones that resonate most with your current needs and space limitations. The most effective systems are those that evolve with you. As your skills grow and your projects change, so too will your organizational needs.
Consider these actionable next steps to begin your transformation:
- Start with a Single Zone: Don't overwhelm yourself by trying to tackle the entire room. Pick one area that causes the most frustration, whether it's your tangled thread collection or your overflowing fabric scraps. Implement one of the solutions, like a thread tower or a modular drawer system, and perfect it before moving on.
- Assess Your Workflow: Pay close attention to your creative process for a week. What tools do you reach for most often? Where do piles tend to accumulate? This observation will provide critical data on which systems, like a magnetic tool holder or a cutting table with integrated storage, will offer the most significant impact.
- Combine and Customize: The true magic happens when you combine these sewing room organization ideas. Perhaps you'll use a rolling cart for your current project's materials, a pegboard for your cutting tools, and a filing system for your treasured patterns. Mix and match to create a hybrid solution that is uniquely yours.
Key Takeaway: A truly organized sewing room isn't about achieving a picture-perfect, static space. It's about creating a dynamic, functional environment that serves your creative process, minimizes frustration, and maximizes your time spent doing what you love: sewing.
The True Value of an Organized Sewing Room
Ultimately, investing time in organizing your sewing room is an investment in your creativity. A well-ordered space reduces the mental clutter that can stifle inspiration. It transforms the frustrating search for a specific bobbin or pattern into a seamless, enjoyable process. When your tools are accessible and your materials are visible, you're more likely to start new projects, experiment with new techniques, and find joy in every stitch.
Embrace the process of organizing as part of your craft. It’s an ongoing dialogue between you, your supplies, and your space. Celebrate each small victory, whether it's a perfectly sorted drawer of buttons or a neatly stacked shelf of fabric. You are not just cleaning up; you are curating an environment where your best work can come to life. Your future creative self will thank you for the thoughtful, organized foundation you build today.
Ready to elevate your sewing setup with tools that are as smart and efficient as your new organizational system? Explore the precision-engineered cutting mats and rotary cutters at Famcut.com. Their high-quality products are designed to complement a well-organized workspace, ensuring every cut is as perfect as your neatly arranged supplies. Visit Famcut.com to find the essential tools that will help you make the most of your beautifully organized creative space.