


Hand Binding a Quilt: A Practical Guide to hand binding a quilt
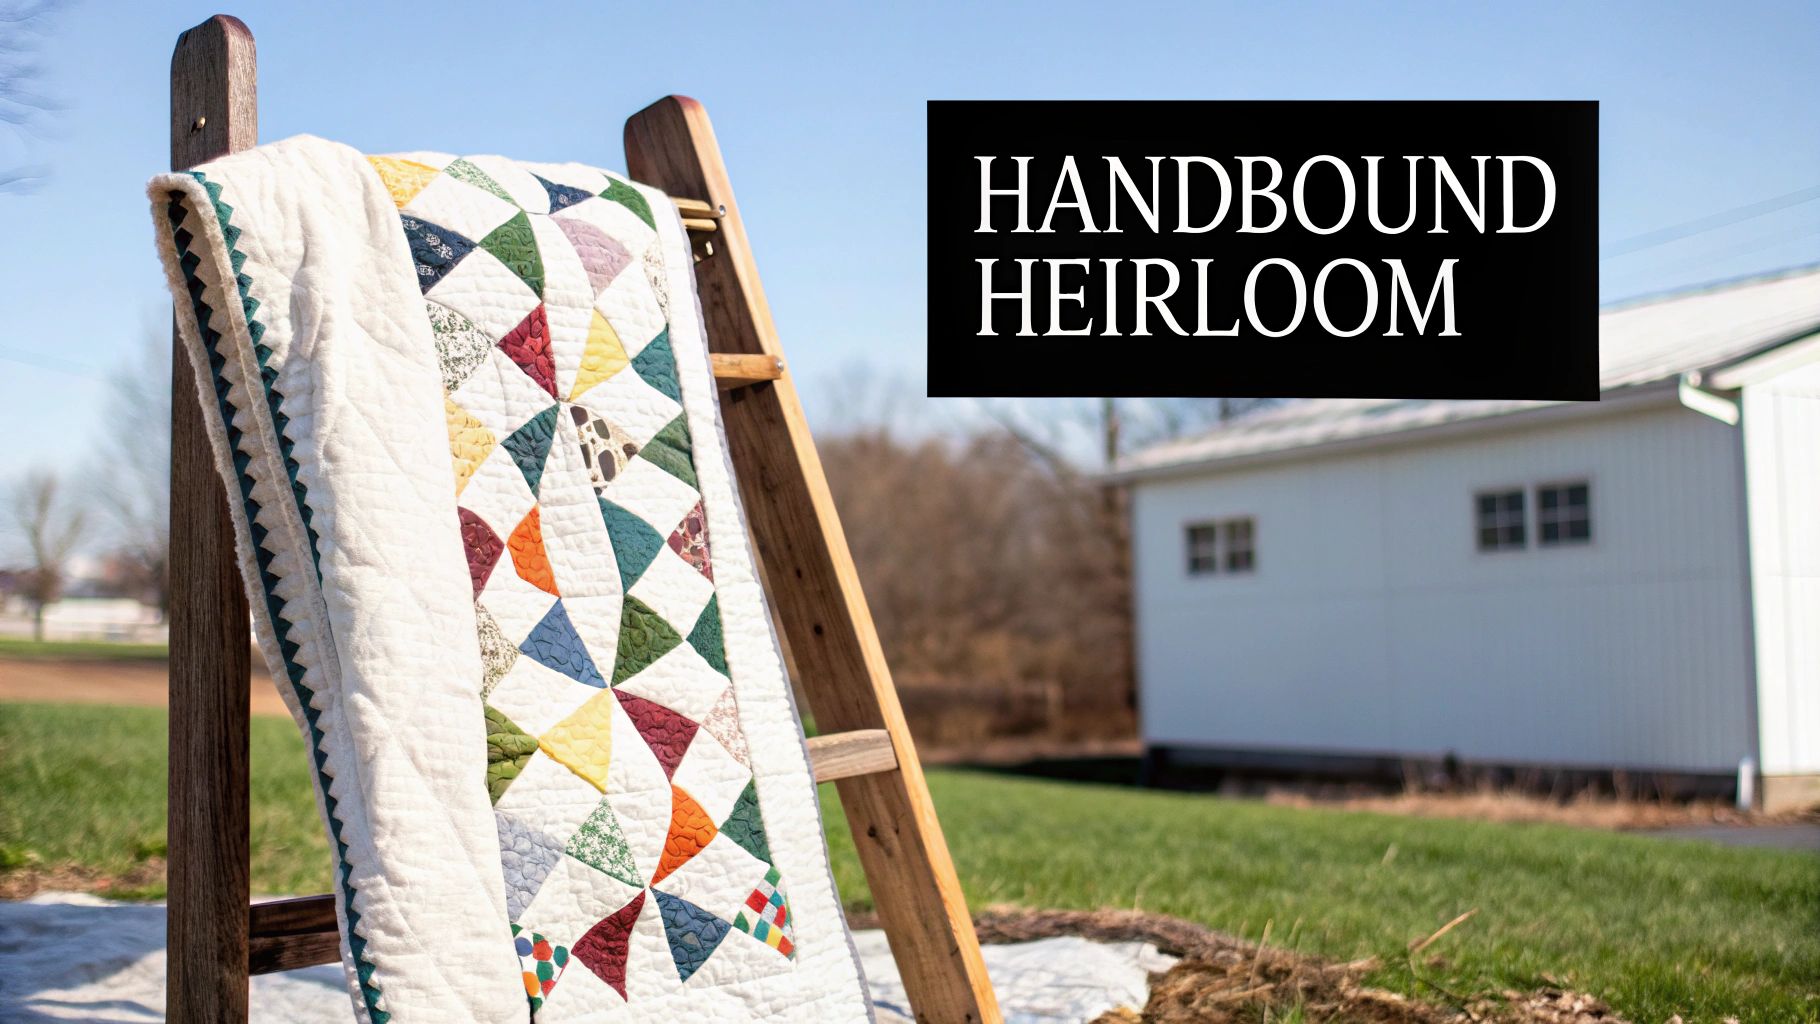
There's nothing quite like the final step of hand binding a quilt.It’s the quiet, meditative process of finishing your quilt’s edge with careful hand-sewn stitches—a timeless technique that gives your project a personal, heirloom-quality touch that a machine just can't match. This is more than just finishing a project; it's the final, loving signature on a piece you've poured your heart into.
Why Hand Binding Still Matters in Modern Quilting
In a world of high-speed sewing machines and quick-finish techniques, you might wonder why anyone would choose the slow, deliberate act of hand binding. The truth is, this method is still cherished by quilters everywhere for the beautiful finish it creates and the personal connection it forges with the work.
The real magic of hand binding lies in its nearly invisible stitches. They create a clean, professional edge that melts into the fabric, free from the sometimes-harsh line of machine topstitching. This gentle approach helps preserve the soft, traditional feel of a quilt, which is why it's the go-to choice for those special heirloom pieces meant to be loved for generations.
A Tradition with Deep Roots
When you hand-bind a quilt, you're taking part in a rich history. The art form can be traced all the way back to 14th-century Sicily, where surviving quilts showcase incredible hand-stitched bindings and intricate trapunto. Even when rotary cutters revolutionized quilt piecing in the 1980s, the art of hand binding held its ground.
Fast forward to today, and of the 11 million quilters in the U.S., surveys show that 45% still prefer hand binding for its polished look. It’s a beautiful blend of historical precision and modern craft.
Key Takeaway: Choosing to hand-bind isn't just about the technique; it's about embracing a tradition that values craftsmanship and adds a signature, personal touch to your work.
More Than Just a Pretty Edge
The perks of hand binding go far beyond just how good it looks. The process itself is wonderfully meditative. It's a chance to slow down, settle in, and really appreciate the quilt you’ve created. For me, it’s the perfect way to spend a quiet evening, finding a calming rhythm as I put the finishing touches on a project. Many quilters agree that this final step is often the most rewarding part of the entire journey.
Plus, learning this skill pays dividends elsewhere. The patience and precision you develop by controlling your stitches by hand will make you a better sewer all around. If you're looking to build your skills from the ground up, you can find a solid foundation with some free sewing lessons to start your creative journey. This guide will walk you through every step, giving you the confidence to create a beautiful finish on any quilt you make.
Getting Your Quilt Ready for the Perfect Binding
Let's be honest, a great binding doesn't just happen by magic. That flawless, hand-stitched edge you're dreaming of is built on the prep work you do right now. This is your foundation for straight lines, flat corners, and a quilt that's ready for its final frame.
Think of it like priming a wall before you paint. Skipping this step almost always leads to frustration down the road. Taking a few extra minutes to properly square up and trim your quilt is one of the most important things you can do to get that polished, professional finish.
Squaring Up: The Secret to Crisp Edges
After all that quilting, the edges of your project can get a little wavy or stretched out of shape. "Squaring up" is just the fancy term for trimming the quilt sandwich to create perfectly straight sides and true 90-degree corners. For sharp, neat binding, this is a non-negotiable step.
First, lay your quilt out on the biggest cutting mat you have. Grab a long quilting ruler and your sharpest rotary cutter. You'll want to align the ruler with a seam line or block edge that runs close to the quilt's border—this is your guide. Make that first cut, trimming away the excess backing, batting, and quilt top to create a clean, straight edge. From there, just rotate the quilt and repeat for all four sides. I always use a square ruler at the corners to make sure they are perfect right angles.
A Clean Trim on Batting and Backing
As you square up, the goal is to get a single, clean slice through all three layers. This is where a fresh blade in your rotary cutter is your best friend. A sharp blade will glide through the quilt top, batting, and backing in one smooth pass. A dull one? It'll snag the batting and leave you with frayed fabric edges, making it a real headache to attach the binding neatly.
A classic mistake is trimming too little, leaving fluffy batting peeking out. That extra bulk will stop your binding from folding over smoothly. On the flip side, trimming too much can cut right into your beautiful quilting. The key is to trust the straight line you've established with your ruler and ensure all layers are perfectly flush.
If you're still choosing your batting, an 80/20 cotton-poly blend is a fantastic, reliable choice because it's stable and trims up so nicely. The Hobbs Heirloom 80/20 Batting Package is a go-to for many quilters for exactly this reason.
My Favorite Pro Tip: After trimming, take a minute to stay-stitch about 1/8 inch from the raw edge all the way around your quilt. It’s a simple step, but it works wonders to secure the three layers and prevent any seams along the edge from popping open while you work.
Calculating and Cutting Your Binding Strips
There's nothing worse than getting halfway around your quilt and realizing you're short on binding. A quick bit of math can save you from that nightmare scenario.
- Get the Perimeter: First, measure all four sides of your squared-up quilt and add them together. For a 50" x 60" quilt, your perimeter is 220 inches (50 + 50 + 60 + 60).
- Add a Little Extra: I always add at least 15 extra inches to my total. This gives you plenty of wiggle room for mitering the corners and joining the ends without any stress. For our example, that’s 220 + 15 = 235 inches.
- Figure Out Your Strips: Now, just divide your total length by the width of your fabric (WOF), which is usually around 40-42 inches. So, 235 ÷ 40 = 5.875. You can't cut a fraction of a strip, so you have to round up to 6 strips.
For most quilts, I stick with a standard strip width of 2.5 inches. This is perfect for double-fold binding and creates a finished look that’s about 1/2 inch wide on the back—sturdy, classic, and beautiful.
Why the Diagonal Seam Is Your Best Friend
Once your strips are cut, you need to join them into one long piece. You could just sew them end-to-end, but that creates a really bulky seam right where you don't want it. The absolute best way to do this is with a diagonal seam.
Here's how: place two strips right-sides together, forming a 90-degree angle. Draw a diagonal line from the top-left corner to the bottom-right of that little overlapping square, and stitch right on your line. Trim the excess fabric about 1/4 inch away from the seam and press it open.
This clever technique distributes the seam's bulk along a diagonal, which makes the binding stronger, more flexible, and lets it lie perfectly flat when you fold it. Keep doing this until all your strips are joined together. The last step is to press the entire long strip in half lengthwise with the wrong sides together, and you're all set to start binding.
Attaching the Binding and Mastering Mitered Corners
Now that your quilt is squared up and the binding is ready, it's time for one of the most satisfying steps: attaching it to your quilt. Even if you plan to hand-finish, this first pass is almost always done on the machine. Getting this first line of stitching right is what sets you up for a flawless final edge.
Before you even think about starting, pop a walking foot on your sewing machine. A walking foot is a quilter's best friend—it grabs all three layers (top, batting, and backing) and pulls them through at the same speed. This little trick is your secret weapon against puckers and shifting, making sure your binding lies perfectly flat.
Alright, let's get that binding on.
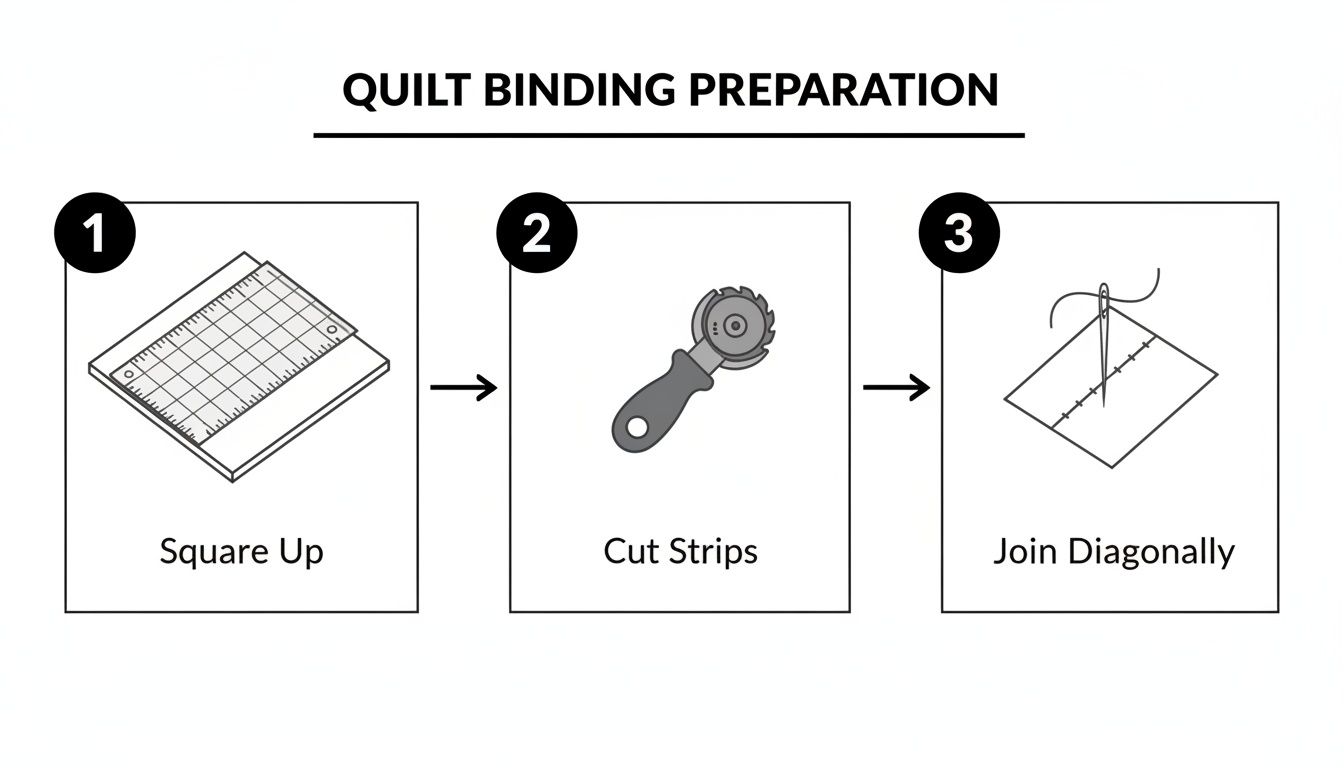
As you can see, a great binding really starts with great prep—a perfectly squared quilt, clean cuts, and those strong diagonal seams holding your strips together.
Starting and Stitching the Binding
Find a spot about halfway down one side of your quilt to begin. Don't start near a corner; it just makes things complicated later. Leave a nice long "tail" of at least 8-10 inches of unsewn binding at the start. You'll need this to connect the ends neatly later on.
Line up the raw edges of your folded binding strip with the raw edge of the quilt top. Using a standard 1/4-inch seam allowance, start sewing the binding down. Consistency is everything here. A perfectly straight seam is what makes the binding look so beautifully even on both sides when you're done.
The Art of the Perfect Mitered Corner
Ah, the mitered corner. This is the hallmark of a quilt that’s been finished with care. It might look fancy, but it’s really just a simple sequence of stopping, pivoting, and folding. Once you nail this, you'll never go back to bulky, rounded corners again.
As you approach the first corner, slow down. Stop sewing exactly 1/4 inch away from the quilt's edge—the same width as your seam allowance. Backstitch just a couple of stitches to lock it in, and pull the quilt away from the machine. Hitting that 1/4-inch mark is critical, so don't rush it.
Next, take the binding strip and fold it straight up, away from the quilt. This creates a perfect 45-degree angle at the corner. The raw edge of the binding should now run parallel to the side you haven't sewn yet.
Hold that fold with your thumb, and then bring the binding strip straight back down, aligning its raw edge with the raw edge of the next side of the quilt. You'll have a neat little fabric triangle tucked underneath.
My Two Cents: That crisp 45-degree fold is the whole secret to a beautiful miter. Don't overthink it. Just fold up to make the diagonal line, then fold straight back down to line up with the next side.
Once the fold is in place, I like to use a few clips to keep everything from shifting. These handy G-easy Clips have a great grip and are a lifesaver here. Now, take it back to the machine. Start sewing right from the very top edge of the new side, lock your stitches, and continue on your way. Repeat this little dance for all four corners.
Creating a Seamless Join
After you've turned that last corner and you're heading for home, stop sewing when you're about 12-15 inches away from where you started. You should have two long binding tails. This is the part that trips a lot of people up, but making a clean, invisible join is easier than it looks.
First, overlap the two tails. Trim the beginning tail so it's a few inches long. Now, lay the ending tail flat over it and trim it so it overlaps the first one by the exact width of your binding strip. So, if you cut 2.5-inch strips, the overlap should be precisely 2.5 inches.
Next, open up the folds of both tails and place them right sides together, forming a right angle—just like you did when you first pieced your long binding strip. Draw a diagonal line from corner to corner, sew right on that line, and then trim the excess fabric about 1/4 inch away from your new seam.
Finger-press that tiny seam open, refold the binding, and it should now fit perfectly into the gap on your quilt's edge. All that's left is to sew down that final section of binding.
Stand back and admire your work! The initial attachment is done, your corners are sharp, and that join is practically invisible. This careful technique elevates a historical craft. During the American Civil War, women's groups produced over 250,000 quilts with functional bindings. Today, surveys show that around 60% of traditional quilters still prefer to hand-bind, turning that practicality into a beautiful art form with polished techniques just like this one.
If you'd like to dive deeper, this guide covers more general quilt binding techniques and is a fantastic resource.
The Art of the Invisible Hand Stitch
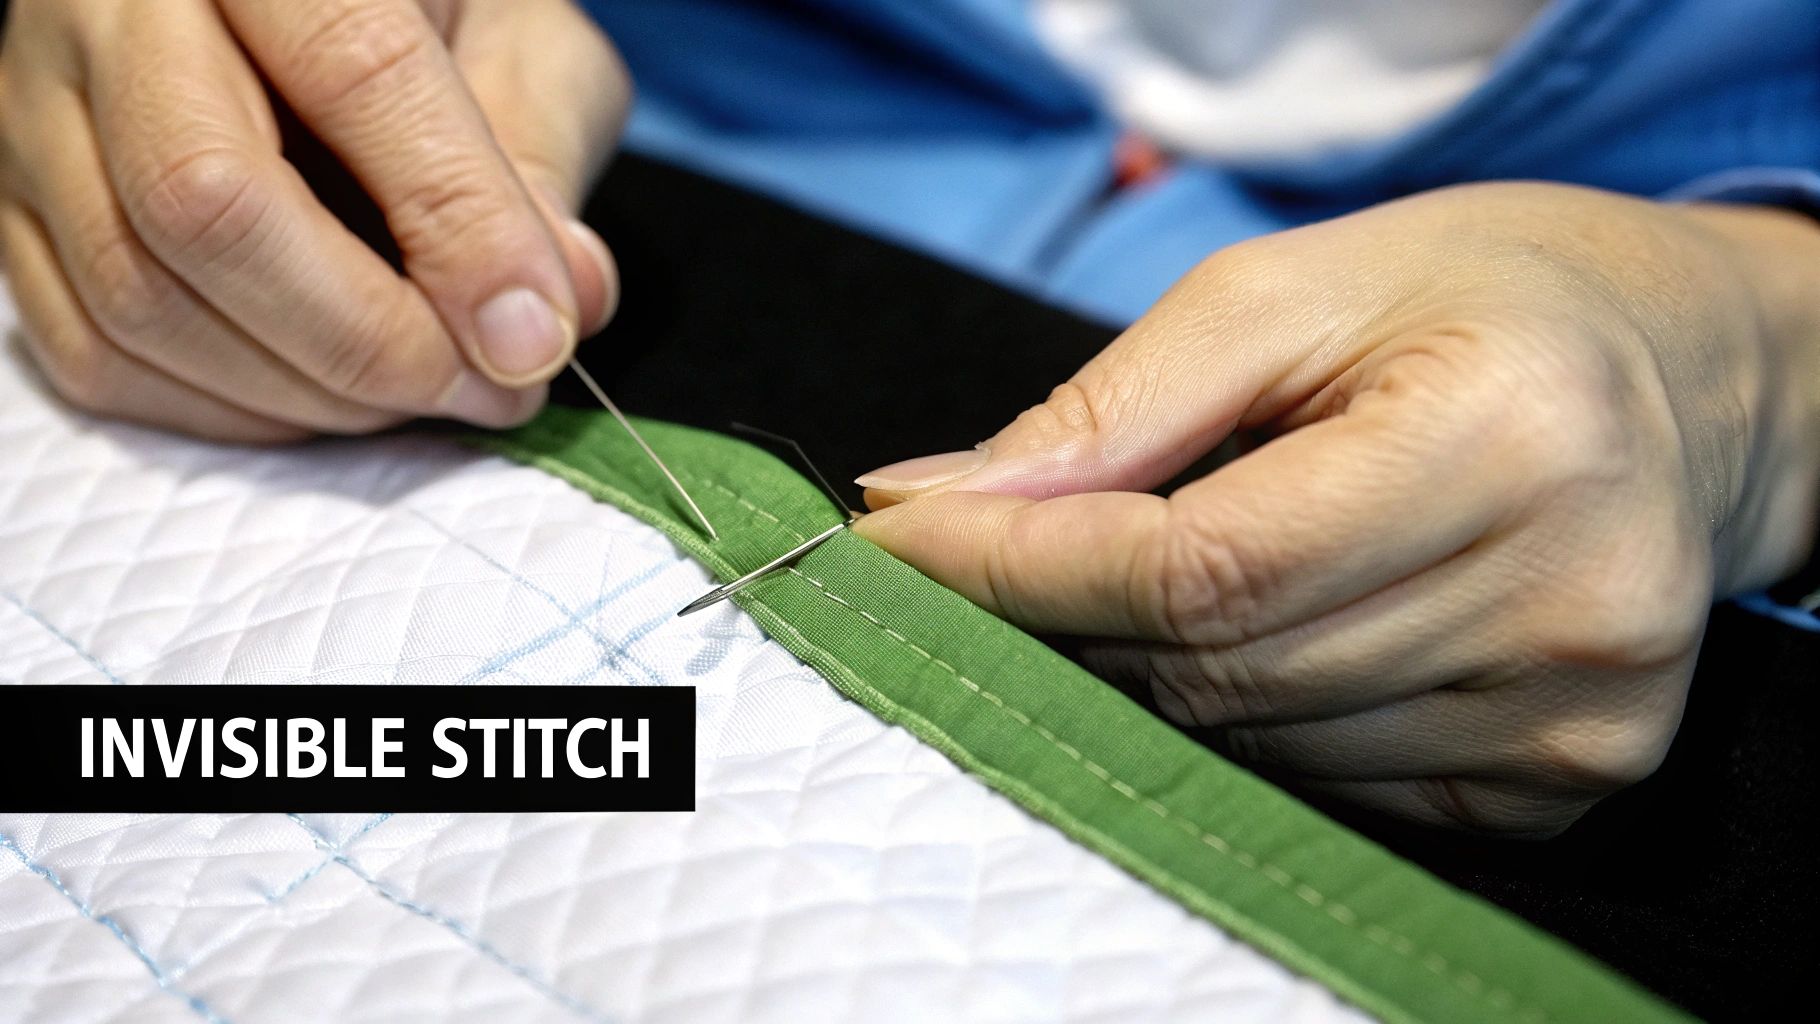
You’ve reached what many quilters consider the best part of the whole process. This is where you can finally sit back, take a deep breath, and finish your quilt with the quiet, satisfying rhythm of a needle and thread. Our goal here is to master the blind stitch, a technique that creates a finish so clean and professional, it’s virtually invisible.
Also known as a ladder stitch, this technique works by hiding the thread between the quilt's backing and the folded edge of the binding. When you get it right, there's no visible thread on the front or the back—just a beautifully crisp, heirloom-quality edge. It’s a skill that truly elevates a quilt from a simple project to a work of art.
Setting Up for Stitching Success
Having the right tools for this delicate stage makes all the difference. You don’t need much, but choosing well will save you a world of frustration and make the process far more enjoyable.
- Your Needle: A sharp, fine needle is your best friend here. I personally recommend a “between” or quilting needle in a size 8 to 10. They’re short and strong, which gives you fantastic control. If threading tiny needles feels like a chore, these John James Easy Threading Needles are an absolute game-changer.
- Your Thread: Go for a high-quality, 50-weight cotton thread. The most important thing is to match the color to your binding fabric as closely as possible. A perfect match is your first defense against stitches that stand out.
- The Extras: Don’t forget a thimble! It will save your finger from getting sore as you push the needle through multiple layers. A small, sharp pair of scissors for clean snips is also a must-have.
Before you make your first stitch, prepare your thread with a quilter’s knot. This isn't just any old knot; it’s small enough to be hidden but strong enough to anchor your work securely. To make one, just wrap the thread end around your needle a few times, then pull the needle all the way through the loops, cinching them down into a tidy knot at the end.
The Motion of the Blind Stitch
With your quilt comfortably in your lap and your thread ready to go, it’s time to begin. The first step is to hide that knot. Bring your needle up from underneath the quilt, about an inch from where you plan to start stitching. Pop the knot through the backing fabric so it gets buried securely in the batting layer. Now, bring the needle out right at the seam where the binding meets the quilt back.
The stitch itself is a simple two-part motion that creates that "ladder" effect.
- Grab the Backing: Directly across from where your thread came out, use the very tip of your needle to pick up just a few threads of the quilt’s backing fabric. The key is to be shallow—you don’t want the needle to go all the way through to the batting.
- Travel in the Fold: Immediately slide your needle into the folded edge of the binding, right opposite where you just grabbed the backing. Guide the needle inside the fold for about 1/4 inch before bringing it back out.
Pull the thread taut, but not so tight that it puckers. You’ll see the binding snug up perfectly against the backing, making the stitch disappear. That’s all there is to it! You just repeat this simple dance—a tiny bite of backing, a short trip through the binding fold—all the way around your quilt.
Consistency is Your Superpower: The real secret to a stunning hand-bound edge is evenly spaced stitches. Try to aim for about 8-10 stitches per inch. This not only looks amazing but also creates a durable finish that will last for years to come.
Common Problems and How to Fix Them
Even with the best intentions, you might run into a few little issues while stitching. Don't worry, it happens to everyone! I’ve put together this quick troubleshooting guide to help you identify and fix the most common problems you'll encounter.
Binding Stitch Troubleshooting Guide
| Problem | Likely Cause | Solution |
|---|---|---|
| Puckered or bunched fabric | Thread tension is too tight. | Relax your pull. Let the thread snug the binding, not strangle it. Take a few deep breaths and try again. |
| Gaps between binding and quilt | Thread tension is too loose. | Give the thread a gentle, firm tug after each stitch to close the gap before starting the next one. |
| Visible stitches on the back | Your needle "bites" are too deep. | You're catching too much fabric. Aim to pick up just one or two threads from the quilt backing with the very tip of your needle. |
| Uneven or sloppy appearance | Inconsistent stitch length and spacing. | Slow down and focus on making each stitch the same length. It helps to find a comfortable rhythm. Practice makes perfect! |
| Thread keeps knotting or tangling | Thread is too long, or it’s a lower-quality, fuzzy thread. | Work with shorter lengths of thread (about 18-24 inches). If it persists, try a different brand of thread or run your current thread through a bit of beeswax or thread conditioner. |
Remember, every quilter has been there. A little patience and a few adjustments are all it takes to get that beautiful finish you’re after.
Finding Your Rhythm
As you settle in, you’ll naturally find a rhythm. Pay attention to your tension—not too tight, not too loose. It should feel "just right," pulling the binding flush against the quilt without causing any distortion.
Consistent spacing is just as crucial for that polished look. This handcrafted finish is what sets a quilt apart. Even as machines became capable of binding a quilt in under two hours, nearly 40% of modern quilters still choose the 10-20 hour journey of hand binding. It’s a testament to the tactile joy and superior finish that only handwork can provide.
When you near the end of your thread, tie a small knot close to the fabric, take one last tiny stitch, and pop the knot into the batting just like you did at the beginning. Start your new thread, and continue your peaceful journey around the quilt. This is the final act of love you give your creation.
Creative Binding Variations for a Custom Look
Once you’ve got the hang of standard double-fold binding, a whole new world of creative finishes opens up. These aren't just for looks; they can solve real design problems and give your quilt a truly one-of-a-kind feel. When you feel solid on the basics of hand binding a quilt, trying these variations is a fantastic way to stretch your skills.
These different techniques can add a delicate touch to a tiny project or make a bold, modern statement on an art quilt. Each one has its own purpose, letting you match the finish perfectly to the style and function of your quilt.
Single-Fold Binding for a Delicate Touch
Think of single-fold binding as your secret weapon for projects where less is more. It’s perfect for wall hangings, miniature quilts, or even placemats—anything where you want to keep the edge from feeling bulky.
Instead of cutting the usual 2.5-inch strip and folding it in half, you’ll cut a much narrower strip, somewhere around 1.25 inches. Then, you just press the seam allowance under on one long edge. You attach the raw edge to the quilt top, wrap the folded edge around to the back, and stitch it down. The result is a fine, almost invisible edge that doesn't overpower a smaller, more delicate piece.
Quilt Facing for a Modern Frameless Look
Have you ever made an art quilt and felt like a traditional binding would distract from the design? That’s where a quilt facing comes in. This technique gives you a completely clean, edgeless look from the front because the binding is tucked entirely to the back.
The process is a bit backward from what you're used to: you attach the binding strips to the back of the quilt first. After you miter the corners, you wrap the binding around to the front, give it a good press, and then fold it neatly back on itself so it’s perfectly flush with the quilt's edge. A few invisible stitches secure it to the backing, and you're done.
This method is an elegant way to frame your work without an actual frame. It really lets the quilt's design shine, carrying the visual impact right to the very edge.
Adding Piping or a Flange for a Pop of Color
If you really want to make your quilt pop, adding a flange or a bit of piping to the binding is a game-changer. It's a tiny decorative strip of fabric that peeks out from between the quilt top and the binding, creating a thin, vibrant line of color that frames your entire project.
To pull this off, you’ll create a very thin, folded accent strip—that’s your flange. You just layer it between the quilt top and your main binding strip before you start sewing. It’s a small step that makes a huge difference. Choosing the right color is crucial here. If you need some help picking the perfect accent, our guide to Color Basics for Makers is a great resource.
This detail adds such a professional, polished touch. It’s a wonderful way to pull a specific color from your quilt top and carry it all the way to the finish line, making the whole piece feel complete.
A Few Common Questions About Hand Binding
Even with the best instructions, you're bound to run into a few head-scratchers when you're hand-binding a quilt. It happens to all of us! Let's walk through some of the most common questions that pop up, so you can get unstuck and back to that satisfying finish.
Think of this as your personal troubleshooting guide. From picking the right fabric to making your stitches vanish, the answers are usually simpler than you think.
What’s the Best Fabric for Quilt Binding?
You really can't go wrong with 100% quilting cotton. It's almost certainly what you used for your quilt top and back, which means it will behave, wash, and wear just like the rest of your quilt. It’s a workhorse fabric that presses crisply and comes in every color imaginable to match your project perfectly.
But there's one big exception to that rule: curved edges.
If your quilt has a scalloped border or any kind of curve, you need to switch to bias binding. When you cut the fabric at a 45-degree angle to the grain, it gains a natural stretchiness. This lets it hug those curves smoothly without creating any weird puckers or pleats. For regular quilts with straight sides, standard straight-grain binding is your friend—it’s more economical with your fabric and gives you a super stable, straight edge.
How Wide Should I Cut My Binding Strips?
The go-to, tried-and-true width for double-fold binding strips is 2.5 inches. There’s a good reason it’s the standard! When all is said and done, this width gives you a beautiful finished binding of about 1/2 inch on the back of your quilt. It's a classic look that feels sturdy and looks balanced.
That’s not set in stone, though. Your quilt, your rules.
- Some quilters love a daintier edge and prefer cutting their strips at 2.25 inches.
- If you're working with a really thick quilt or just want a bolder frame, you could go up to 2.75 inches.
The Key is Consistency: Whatever width you choose, commit to it for the entire quilt. If you're unsure, do a quick test. Cut a small piece, fold it, and audition it against a scrap of your quilt sandwich. It's the best way to see what look and feel you actually prefer before you cut up all your fabric.
My Hand Stitches Are Visible. What Am I Doing Wrong?
Ah, the phantom stitch problem. Seeing your stitches is frustrating, but trust me, it’s almost always a quick fix. A tiny tweak to your technique usually makes them disappear.
- Check Your Thread Color. It sounds obvious, but make sure you’re using a high-quality thread that is a dead-on match for your binding fabric. Even a slight shade difference can make your stitches pop.
- Rethink Your Stitch Path. The whole magic of a blind stitch is that the thread travels inside the fabric. Your needle should only grab a tiny bite—just a few threads—of the quilt backing. Don't punch all the way through to the batting! Then, guide the needle through the fold of the binding for about 1/4 inch before you pop back out.
- Ease Up on the Tension. If you're yanking your stitches too tight, the fabric will pucker and expose the thread. You're aiming for a gentle but firm tension—just enough to snug the binding to the quilt without causing any strain.
How Do I Calculate How Much Binding I Need?
A little bit of math here saves a massive headache later. Here's the simple formula.
First, you need the perimeter of your quilt. Just add up the lengths of all four sides. Let's say you have a quilt that measures 60 inches by 80 inches: (60 + 60 + 80 + 80) = 280 inches.
Next—and this is important—add an extra 10 to 15 inches to your total. This little buffer is your insurance policy for perfectly mitered corners and for joining the ends seamlessly. So, for our example quilt, you'd want at least 295 inches of binding.
Now, to find out how many strips to cut, just divide that number by the width of your fabric (WOF), which is usually around 40 to 42 inches.
- 295 ÷ 40 = 7.375
You can’t cut a fraction of a strip, so you always round up. To be safe, you’ll cut 8 strips for this quilt.
Ready to start your next masterpiece? At Famcut.com, we have all the high-quality fabrics, notions, and tools you need to bring your quilting and sewing projects to life. Explore our collection and find your inspiration at https://famcut.com.